This Kit Looks like a great deal if I decide to do the front. $199 for everything it’s only 26 wide and the arms come back 6-1/2 inches
Did you see my post about asking the seller for measurements? As for the 90 degrees it sounds like mounting the bar behind the battery box is the only solution or is that the solution which works best with 90 degree arms? If it is the only place to put the torsion bar then I can see that finding an existing bar is unlikely to help.
Either way, I’ll let you continue and won’t add anything further.
Doug: hey thanks for the help and suggestions
If that MG bar works then you have done the community a service. I was just saying it’s frustrating cause sellers don’t list the measurements and that’s causes guys like you & I to chase them down for simple info. The same is true with most of the stuff I have bought for this project ya gotta call to get all the critical measurements. Hey and there is always another way to skin a cat. My install with the bar behind the battery is not the only way it can be done. That major advantage with behind the battery and “ on top “ of the frame rails was Clearance. If you mounted the bar on the bottom side of the car your options open up.
I just chose the way I mounted so nothing is hanging down. We take the car for mild off road adventures from time to time and I didn’t want anything to ever potentially get hung up. If you Never took your car off the street you could choose the traditional sway bar mounting way
Well after a night to think it over I decided to simply trim the battery tray. (Notice how I replaced the word CUT with Trim ![]() makes it not sound so bad! Besides actually having to cut the battery box I don’t see the down side right now
makes it not sound so bad! Besides actually having to cut the battery box I don’t see the down side right now ![]() I could see if I returned the car to Flooded lead acid the battery tray would be to small and I would need to add the section back. But that’s never gonna happen so, I’ll get to Trimming
I could see if I returned the car to Flooded lead acid the battery tray would be to small and I would need to add the section back. But that’s never gonna happen so, I’ll get to Trimming ![]()
![]()
1 Like
Cutting is Going well! The Easy Side is done. Now I have to disconnect all the Bat cables and BMS wires and cut the side with not as much room.
Before/

After

Plenty of room now. I’ll get the tabs welded on the sway bar tube and then when it’s mounted in its location I’ll start to cut and drill the holes in the Arms for the Drop links .
2 Likes
Grant the GEM rear suspension reminds me of my 1984 GTI. I wonder if that sway bar would fit
I haven’t been following closely.
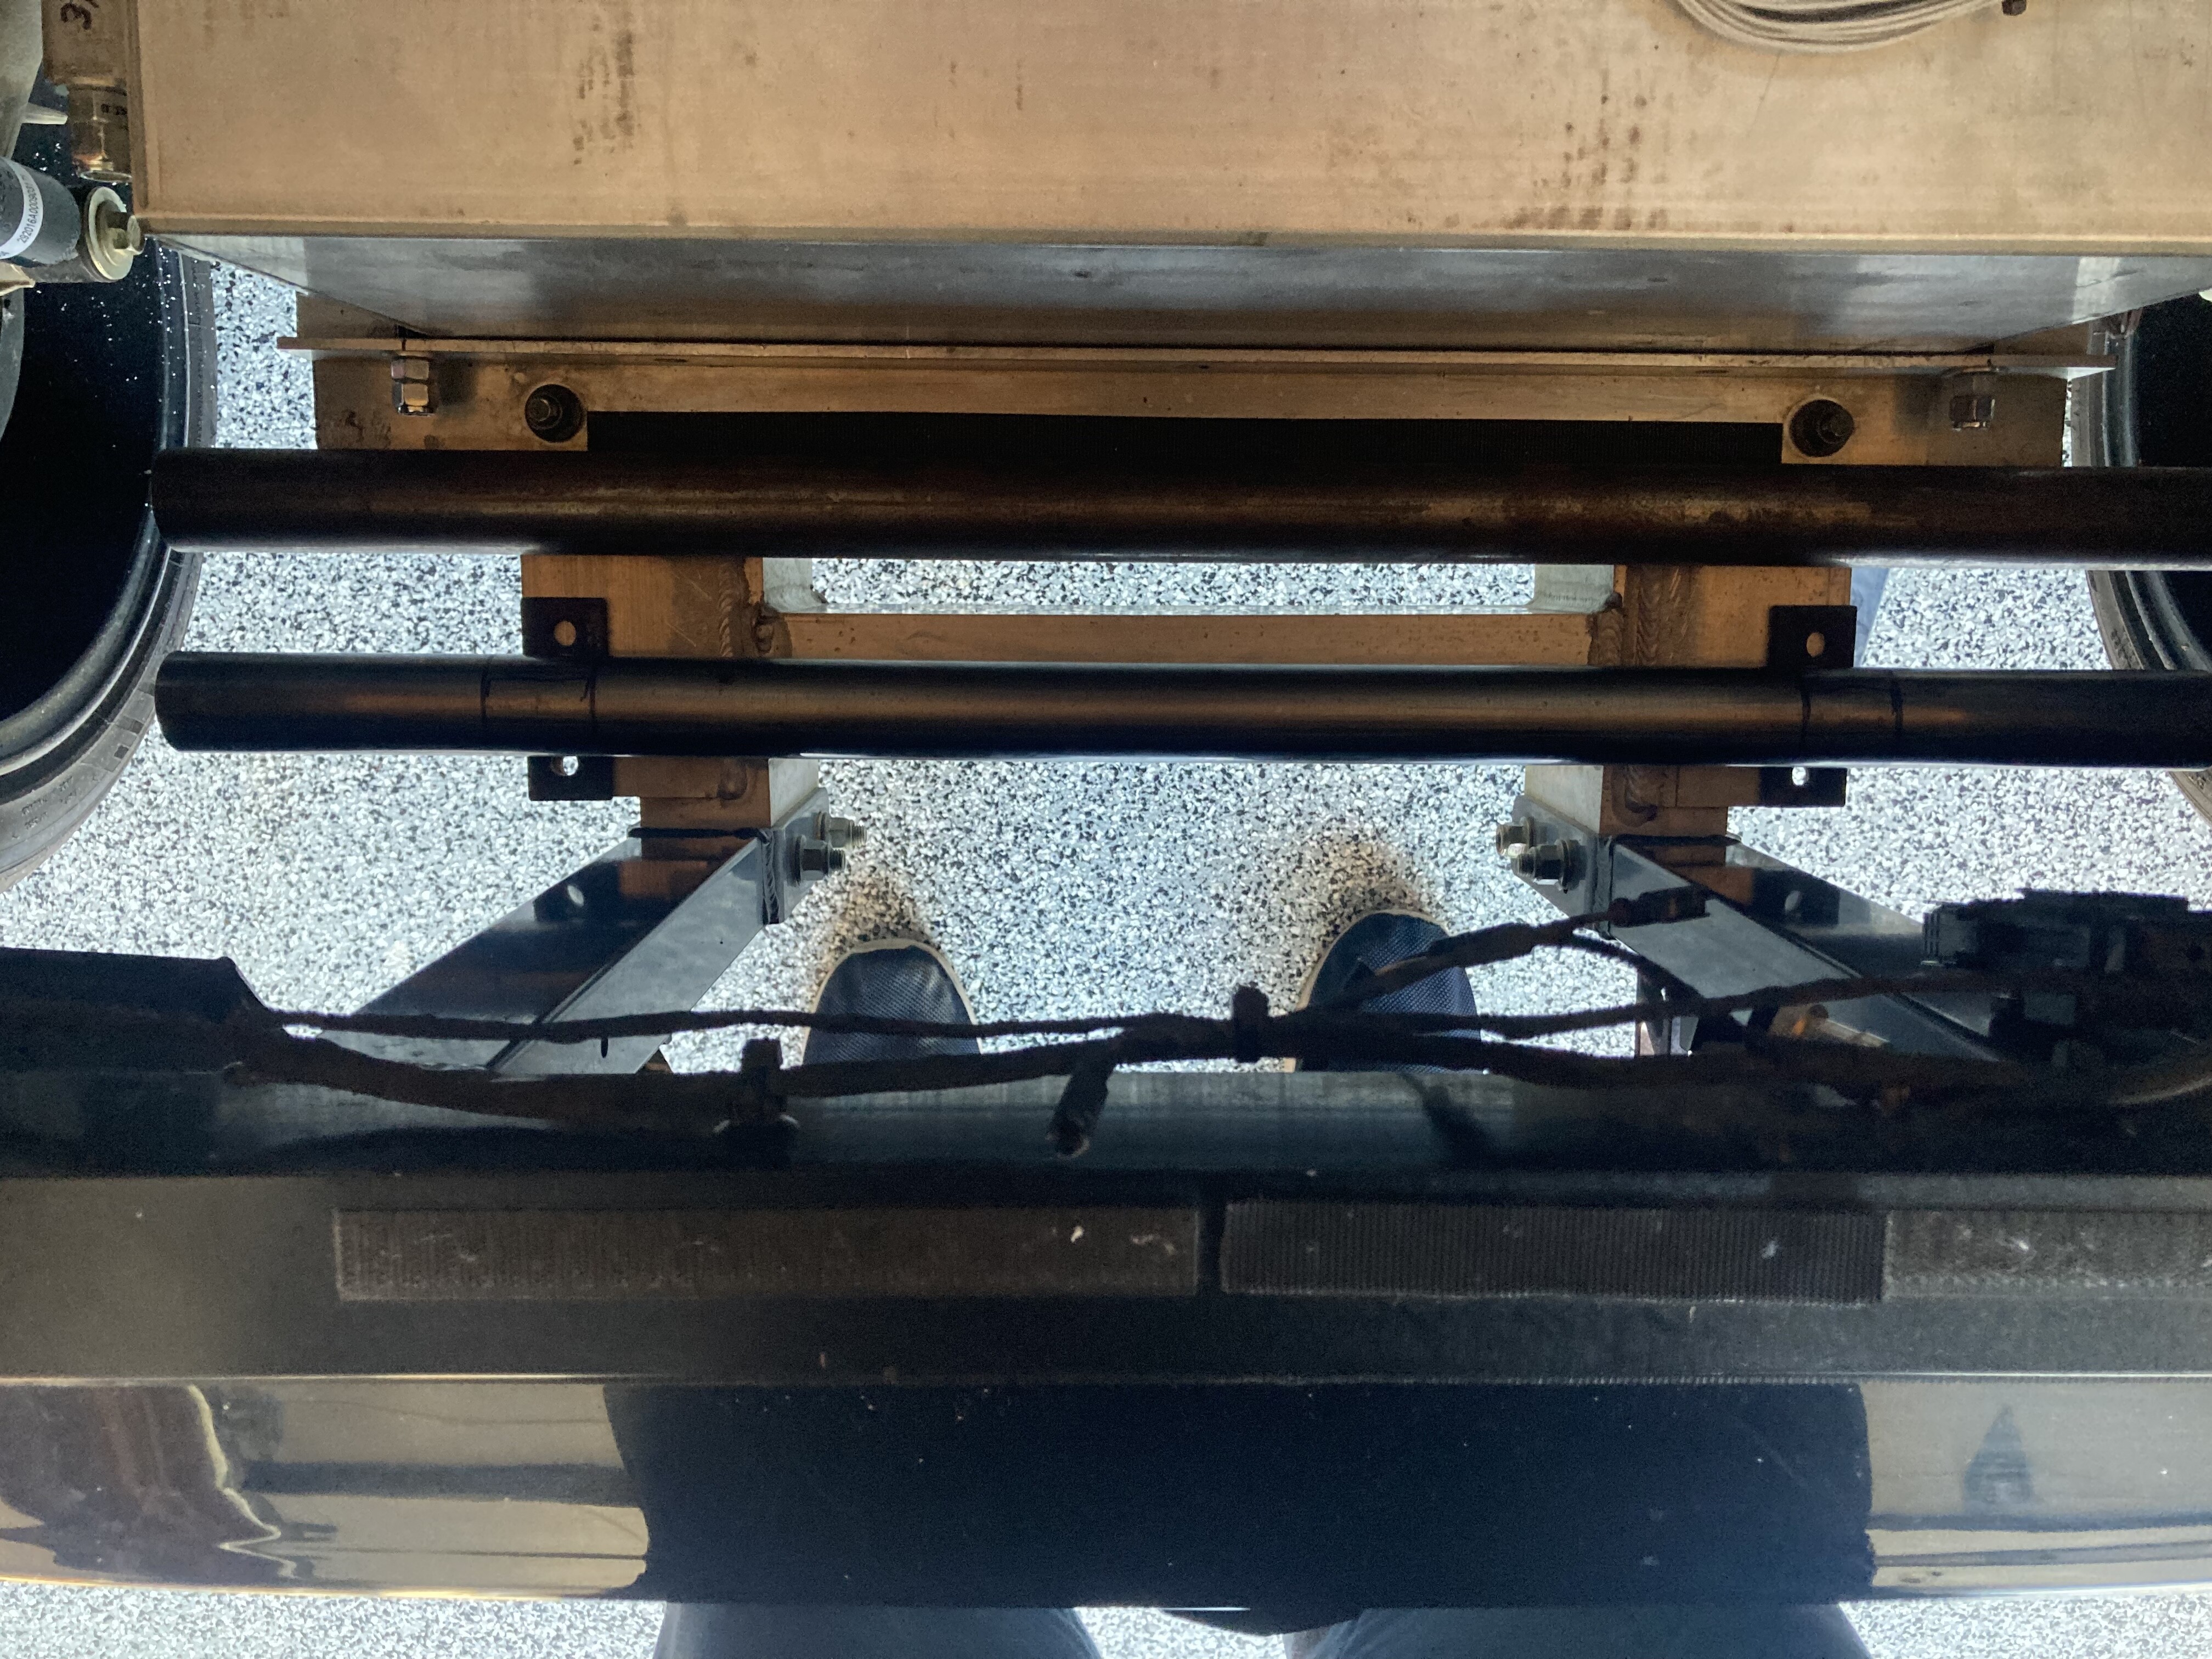
Is that the approximate location of the sway bar?
Or is it pictured to show the width fitment with battery tray?
The coil-over bottom mount is in the middle of sway bar arm.
So, you say you’re trimming the amount of posts you are reading?
** notice how I didn’t say cutting down… It sounds so… so… barbaric…
Dave: the picture was just to show the fitmit or clearance from the battery tray. The sway bar arm will be cut down to size once I get the bar mounted the arm will be close to 10’inches long when I’m done. The 12mm lower shock bolt is going to be the mounting location for the sway bar drop link Mount point. So roughly 1/2 of the sway bar arm is gonna get cut off and adjustment holes added to the arm.
Rick: yes lots of cars look like they could be made to work. You would have to have one in hand and play around
FWIW, the MG Midget Front Sway Bar( 9/16" ) I posted a link to has these dimensions:
30" across( eye-to-eye)
5" in depth( center to center )
if the owner measured as I had requested.
Doug that’s close. The 2016 has a shock mount distance of 35 across so it close
So we just need to stick it in the vise and oipen it up a little bit? LOL
Since that was a front end sway bar, will see what the rear end looks like to see if it’s open a little wider. As you mentioned, the car is about the same weight but it’s also gotta have a mount point which works.
That’s only 2.5 inches on each sideS the drop links can take up 1 inch and if you got some mis alignment spacers they could Make up the rest.
I think their is a stock sway bar out there that’s closer.
1 Like
well 2 step’s backwards 1- step forward. So I brought the Swaybar tube to the welder. (I need to start doing my own welding) He welded on the Tabs that will hold down the Sway Bar tube to the car. Next step is have a few thousands taken off the Bronze bushings so they will fit into the Tube. Well it turns out that putting the bushings on the laith and milling what needed to come off the bushings would have made them 2 thin, So we thought :Hey let’s mill OUT the inside diameter of the pipe’ Well it turns out that would have been possible if i Had NOT welded the tabs on!!! Damm. So turns out we found a pipe that had the exact ID to fit the bronze bushings we have And that’s great cause we don’t have to have the pipe put on a machine & anything taken off or milled. So now I just need to get some new tabs welded on and we can proceed forward!
So this is a pic of the tube (that I can’t use) with the tabs that I got welded on. So this piece is Junk! O well Notice I only need to drill 2 new holes! The other holes were factory
1 Like
Ok we are Getting closer. The Sway bar tube is welded & painted l will get her mounted up this weekend.

Hey I gotta share a flick can spray paint trick.
Especially when it’s cold. Take your part and your paint & warm them both up. I use a heat gun. I point it at the spray can and the part and get them both warm. Keep shaking the can every few mins you want the can warm. You will notice that the can might seem somewhat hot and when you shake it the can the paint inside it cools the can. Keep warming the can UNTILL it’s warm not Hot. Get the part warm as well. You will notice the paint comes of the can faster & with greater pressure & it flows & lays down way more glossy, so much that most of the time you don’t need a 2nd coat. And because you didn’t have to spray a bunch of paint on the part it will dry pretty quickly. nothing worse then a part that still soft 3+ days after you painted it because you put so much paint on it.
1 Like


Awesome Grant!
Are there splines on the ID of the square bar that mate up with the torsion bar?
Or does it just clamp real good?
The bar and the arms are both have a 48 splined ends. Seems to be common for what they refer to as a “speed way bar” The off road guys use a similar set up but they use a 49 spline for what ever reason. My 2002 Gem used a ATV Swaybar that had a “octagon style” bar & arms. Looks like different manufactures change up the bars & the arms as end’s they use. The 48 spline seems to be the most common here in the US