ok got the overhead console system in today…three questions…1st…does anyone have this system (its a factory polaris unit)?? 2nd how does it install to the roof of the GEM Car (mine didnt come with any mounting hardware)?? 3rd…do yall think I should paint this black or leave it gray??
Don’t paint it. It’ll look like hell in a few years if you do.
I believe that GEM did have a the installation hardware/wiring harness available, just under another part number
I advise not using an aux 12V battery to maintain station presets, but instead do like another member did here-- use a NiMH 9V battery and resistor to drop the voltage to what’s needed to charge the 9V battery. Ohms law gets you the value you need. Attach memory power line to it. Sorry, can’t find the post.
You certainly seem to be very busy with your modifications! Do you have any more planned for the future? These are very interesting to hear about and the pictures make it more “real” to members - if that makes sense?
Perhaps you could post before and after pictures if you have time?
i do hane a lot plained for the lil car…its fun trying to make this lil car a step above the reg gem car…i hope to get some pics of all the before and after pics…sometimes i froget and just get carried away and start on one of my little adventures…LOL
ok here are some of the pics as I have started working on the console…
New out of the box…
Now with the speakers mounted…
Now with the radio and the switches mounted…
If you will look at the bottom of the console in the second pic you will see the little LED strip for the cabin lights…But that is going to be different thread…
The reason I used a switch panel was so i could add things later on and all i will have to do is unscrew the panel and and put in new switches…
I will have some pics of the inside of the console prob tomm i have to pic up a few things today…
Thanks mark…I finished up the console tonite and got everything wired in. Tested it all and it all worked on the first shot :eek: :eek: I will post a few pics in the morn…I also have some videos
I notice that the speakers seem to hang over the ends of the enclosure. What size speakers did you use? I wish GEM would have sized the holes for common 6x9 speakers.
[QUOTE=bgeery;15389]I notice that the speakers seem to hang over the ends of the enclosure. What size speakers did you use? I wish GEM would have sized the holes for common 6x9 speakers.[/QUOTE]
well these are a set of 6.5 JVC’s its what i had in the shop at the time…looks like it was intented for a set of 6 inch but you cant fins a 6 inch speaker… they barley hang over and when its installed you cant hardly tell…im gonna get me some better speakers (wet Sounds) and it will sound great…i will post some pics in a few…
[QUOTE=bgeery;15349]1. Attached are the install instructions.
2. Don’t paint it. It’ll look like hell in a few years if you do.
3. I believe that GEM did have a the installation hardware/wiring harness available, just under another part number
4. I advise not using an aux 12V battery to maintain station presets, but instead do like another member did here-- use a NiMH 9V battery and resistor to drop the voltage to what’s needed to charge the 9V battery. Ohms law gets you the value you need. Attach memory power line to it. Sorry, can’t find the post.[/QUOTE]
i wish i could find the post on the 9volt battery install …this would be great im not sure how to hook it up …
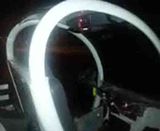
ok here is a pic of the console all wired up and ready to install…as you can see i put the antenna inside the console so i didnt have to drill a hole in the roof that big and also it wouldnt look like a R/C car …
here is the console installed and hooked up…i still need to go get some longer screws so i can flip over the well nuts that mount it…
ok here is short video of the light and the radio working…Sorry about the quality but for me to be able to email it it had to be set on this setting…at one point i was standing about 20-25 ft from the car and it was still LOUD…:shocked:
Hope yall liked it… im trying to get it ready for the summer and take it to the lake…i will be puting red led lights under it later in the week if they come in and adding a 12 volt plug in and at least one more switch… im about done with stuff to do …o yea i gotta get the window tinted and build a rear window…
[QUOTE=nosgsxr;15402]i wish i could find the post on the 9volt battery install …this would be great I’m not sure how to hook it up …[/QUOTE]
I still can’t find the post. I am no electronics expert, but I did read more on the subject in general, and here is how I’d do it based on what I read and some guesswork on my part.
Measure the exact 12V voltage you are getting up at the radio. (I’ll just assume 13.0 volts) [U]ADDED: Also subtract the voltage drop of the diode you will be using from this number, as shown in the Radio Installation PDF.[/U]
Find out the mAh capacity of the 9V NiMH battery you want to use. (I’ll just assume 250mAh)
We want to make a simple voltage divider and also current limit the trickle charging of the NiMH to C/10 rate (25mA in my assumption) at about 1.4V per cell (9.8V total).
Using the calculator here we can figure out the value we need for current limiting (R1).:
Supply Voltage - 9.8 volts (from step 3)
Voltage Drop Across LED - 0 volts (not used)
Desired LED Current - 25 ma (from step 2)
Gives us a nearest standard resistor value of 430 ohms.
Using the calculator here we can figure out the other resistor value (R2) for the voltage divider circuit.:
Input Voltage - 13.0 (from step 1)
R1 - 430 (From step 4)
R2 - (leave blank)
Output Voltage - 9.8 (from step 3)
Gives us a calculated value of 1316.88 Ohms for R2 (nearest standard value is 1.3KOhms)
So now we have all the info to build the voltage divider that will drop the voltage down to 9.8 volts and limit the current to 25ma. I’d use 1/2 watt resistors. Using the wiring diagram in the stereo installation PDF, it should be easy enough to figure out how to substitute the 12 Volt LA battery with your 9V battery and voltage divider.
[QUOTE=bgeery;15407]I still can’t find the post. I am no electronics expert, but I did read more on the subject in general, and here is how I’d do it based on what I read and some guesswork on my part.
Measure the exact 12V voltage you are getting up at the radio. (I’ll just assume 13.0 volts) [U]ADDED: Also subtract the voltage drop of the diode you will be using from this number, as shown in the Radio Installation PDF.[/U]
Find out the mAh capacity of the 9V NiMH battery you want to use. (I’ll just assume 250mAh)
We want to make a simple voltage divider and also current limit the trickle charging of the NiMH to C/10 rate (25mA in my assumption) at about 1.4V per cell (9.8V total).
Using the calculator here we can figure out the value we need for current limiting (R1).:
Supply Voltage - 9.8 volts (from step 3)
Voltage Drop Across LED - 0 volts (not used)
Desired LED Current - 25 ma (from step 2)
Gives us a nearest standard resistor value of 430 ohms.
Using the calculator here we can figure out the other resistor value (R2) for the voltage divider circuit.:
Input Voltage - 13.0 (from step 1)
R1 - 430 (From step 4)
R2 - (leave blank)
Output Voltage - 9.8 (from step 3)
Gives us a calculated value of 1316.88 Ohms for R2 (nearest standard value is 1.3KOhms)
So now we have all the info to build the voltage divider that will drop the voltage down to 9.8 volts and limit the current to 25ma. I’d use 1/2 watt resistors. Using the wiring diagram in the stereo installation PDF, it should be easy enough to figure out how to substitute the 12 Volt LA battery with your 9V battery and voltage divider.[/QUOTE]
hey thanks for the info and i will look into it alittle more…i have been thinking about the SUB woofer but for now im gonna hold off till i get to use the car…i have had it for almost a year and have only put 26 miles on it…but this summer i will use it alittle more…:D:D
Wanted to add a couple more things I may have left out.[QUOTE=bgeery;15407]2. Find out the mAh capacity of the 9V NiMH battery you want to use. (I’ll just assume 250mAh)
We want to make a simple voltage divider and also current limit the trickle charging of the NiMH to C/10 rate (25mA in my assumption) at about 1.4V per cell (9.8V total).[/QUOTE]
You may also want to measure the current drawn of the memory line. Both when the radio is on, off, and with 12V power disconnected.
Depending on the memory line current demand, a 9V NiMH may not be enough capacity. A 8-cell AA battery holder would be a good alternative.
You may want to add that memory line current demand to the 25mA figure in my example. You also may want to charge the batteries as slowly as C/300 when used in float service. That would be only about a mA (plus worst-case mA draw of the memory line) for a 250mAh 9V NiMH.
I’m thinking of making my console into a place to mount fans where the speakers would go… think they’d cool and defog the windows… follow nosgsxrs lead of the switch panel… mount the items that I have on the dash… the clock/temp gauge… backup cam monitor and battsix monitor above my head… I really don’t need sounds or can always mount a radio under the seat…
Well when use well nuts the nut is at the botton so u have to use a bolt long enough to get to the nut. If I were to use regular nuts than I could have used 1/2 inch …but I used well nuts to help cover the the bolts and they wont back off…