Camera Mirror
You may have noticed the rear camera in the pictures of the LED strips. I installed a mirror that actually has a front & rear camera, recording of both, GPS for speedometer readout, clock. The GPS sensor is under the front dash. I used the same cable raceway as I did for the pixels in the back of the cab. Again it was a pain to fish the wires down through the tubular frame.
Totally off topic… check out that yard in the mirror. We have been having plenty of rain and it is sooo green. I had a small landscaping company from age 15-22. I also still have my hobby business that I started in Y2K DJing (weddings, proms, etc). I’m AKA “Rixound” and this may somewhat explain my need to integrate smart lighting into my GEM. The lighting obsession is actually even deeper though. I was once AKA “Kress Kringle” with one of those big animated light displays from 2009-2015.
Now I am a financial advisor by profession. I realize most financial advisors are not out self-installing solar or geothermal or animated light displays or setting up speakers and uplights in the convention center for fun on the weekend, or tricking out the GEM car. My wife might tell you that I am a little bit nuts, but in a good way.
Anyway back to the GEM
$109 with coupon
https://www.amazon.com/gp/product/B07PD2KJQH/ref=ppx_yo_dt_b_asin_title_o04_s00?ie=UTF8&psc=1
By design this is supposed to strap on to the existing mirror. It’s a good thing I already thought that was kind of lame  because the original mirror placed the front facing camera up in the blue tinted area. So I got a simple magnetic windshield mount, ripped it apart and added 3M adhesive instead of the magnet.
https://www.amazon.com/gp/product/B07BS4S89H/ref=ppx_yo_dt_b_asin_title_o02_s00?ie=UTF8&psc=1
Control Panel
A La Tesla… If you have been following along you know that I had a BMS remote and part of a solar charge controller dangling around the front dash. I decided to make a box to make them neat and accessible.
I started with a hobby box
https://www.mouser.com/ProductDetail/hammond/1599kbk/?qs=4dK74SdgGtw2sskdoLi2Ew%3D%3D&countrycode=US¤cycode=USD
Then I measured and marked it up trying to center the screens in a vertical line. I got out the rotary tool and went to town.
note the spare box upper right just in case I screwed up, and I did.
Just 4 “short” hours later and voila!
Speaking of screens; the round thing at the top is a wireless charging phone mount that works with this sticky nano stuff, you know, science. The LED’s are Bluetooth controlled via an app as well as the many other things a smartphone has to offer the well-focused driver. 
Now to make it look pretty and finished… My first thought was to mask it off and spray with Plasti-Dip rubber. Instead, I ended up putting the box face down on a scanner at this phase. Then I edited and augmented the resulting image in MS paint & Photoshop. Finally I printed it out and laminated it. This ended up taking some trial and error. Credit to Wifey for letting me borrow her special craft cutter and Martha Stewarts own razor circle cutter thingy.
https://www.amazon.com/Martha-Stewart-Crafts-Simple-Circle/dp/B002BTUHBU
If you look really close you can see that I still need to refine the screen cutouts a few mm one way or the other. If you are looking at a distance… it still looks pretty homemade. I may look into matte finished lamination pouches or getting this printed on vinyl, maybe. It’s more than adequate for proof of concept, nonetheless.
!
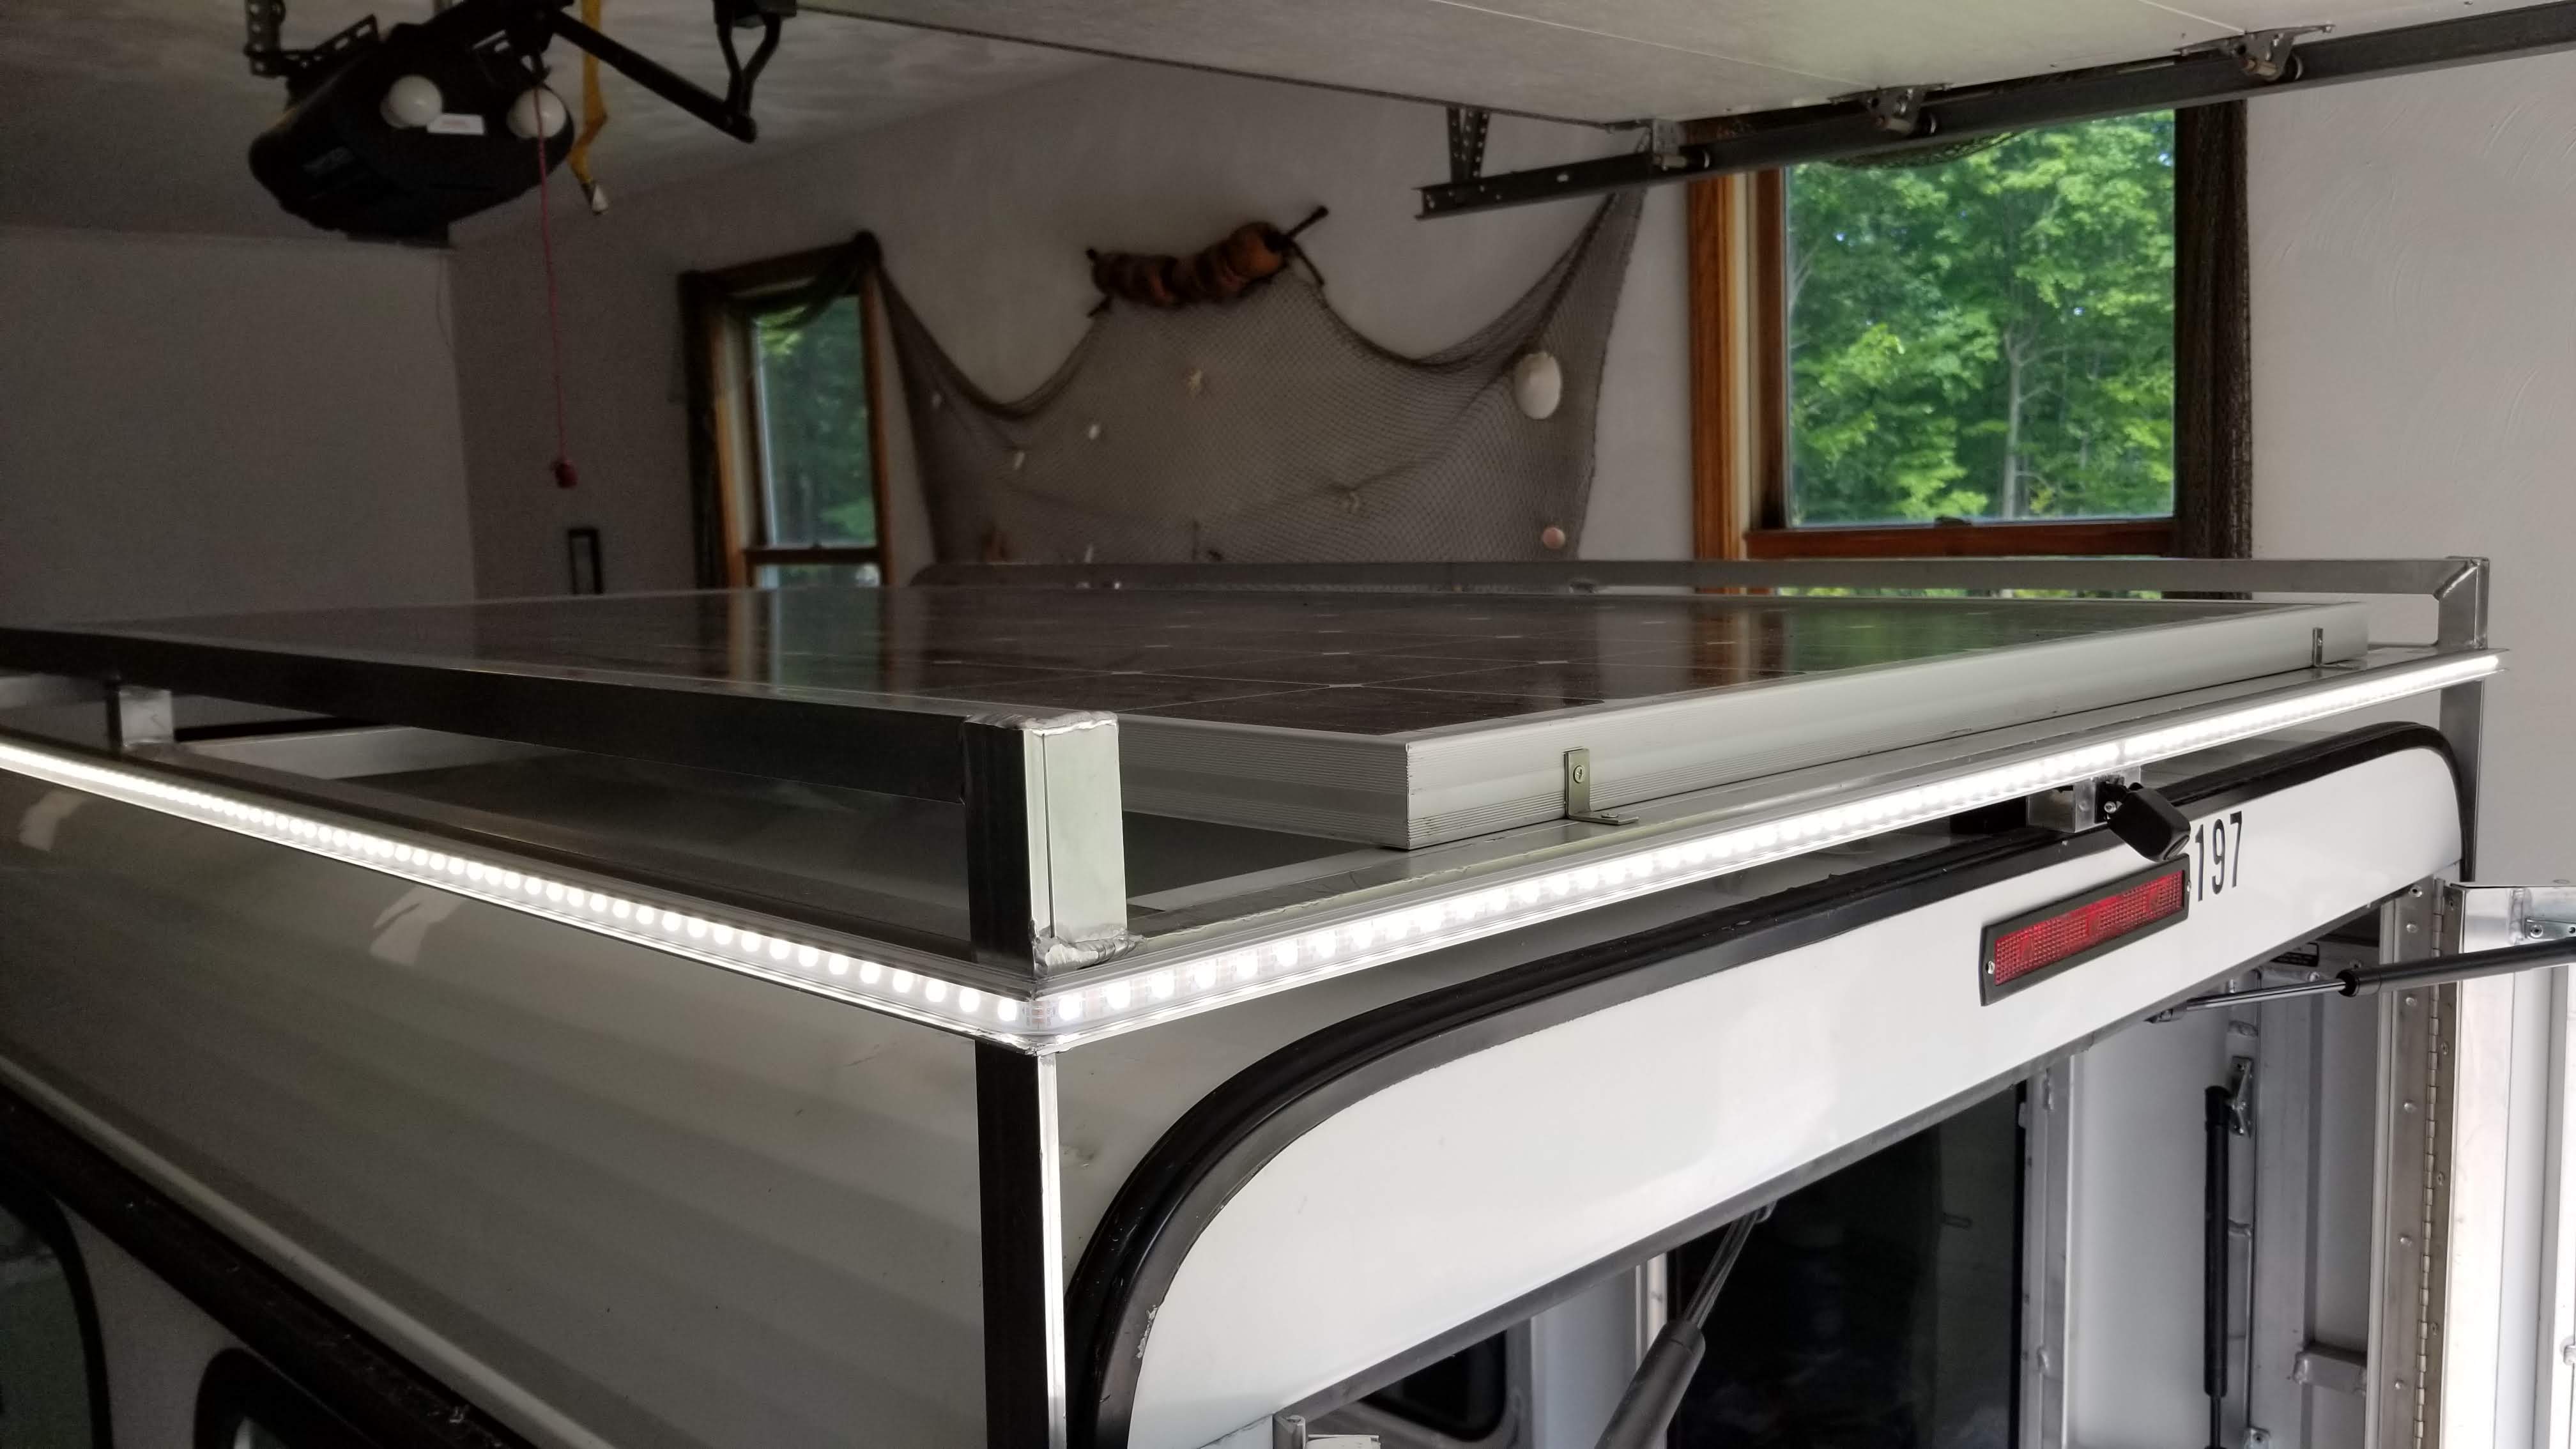
Solar Charging
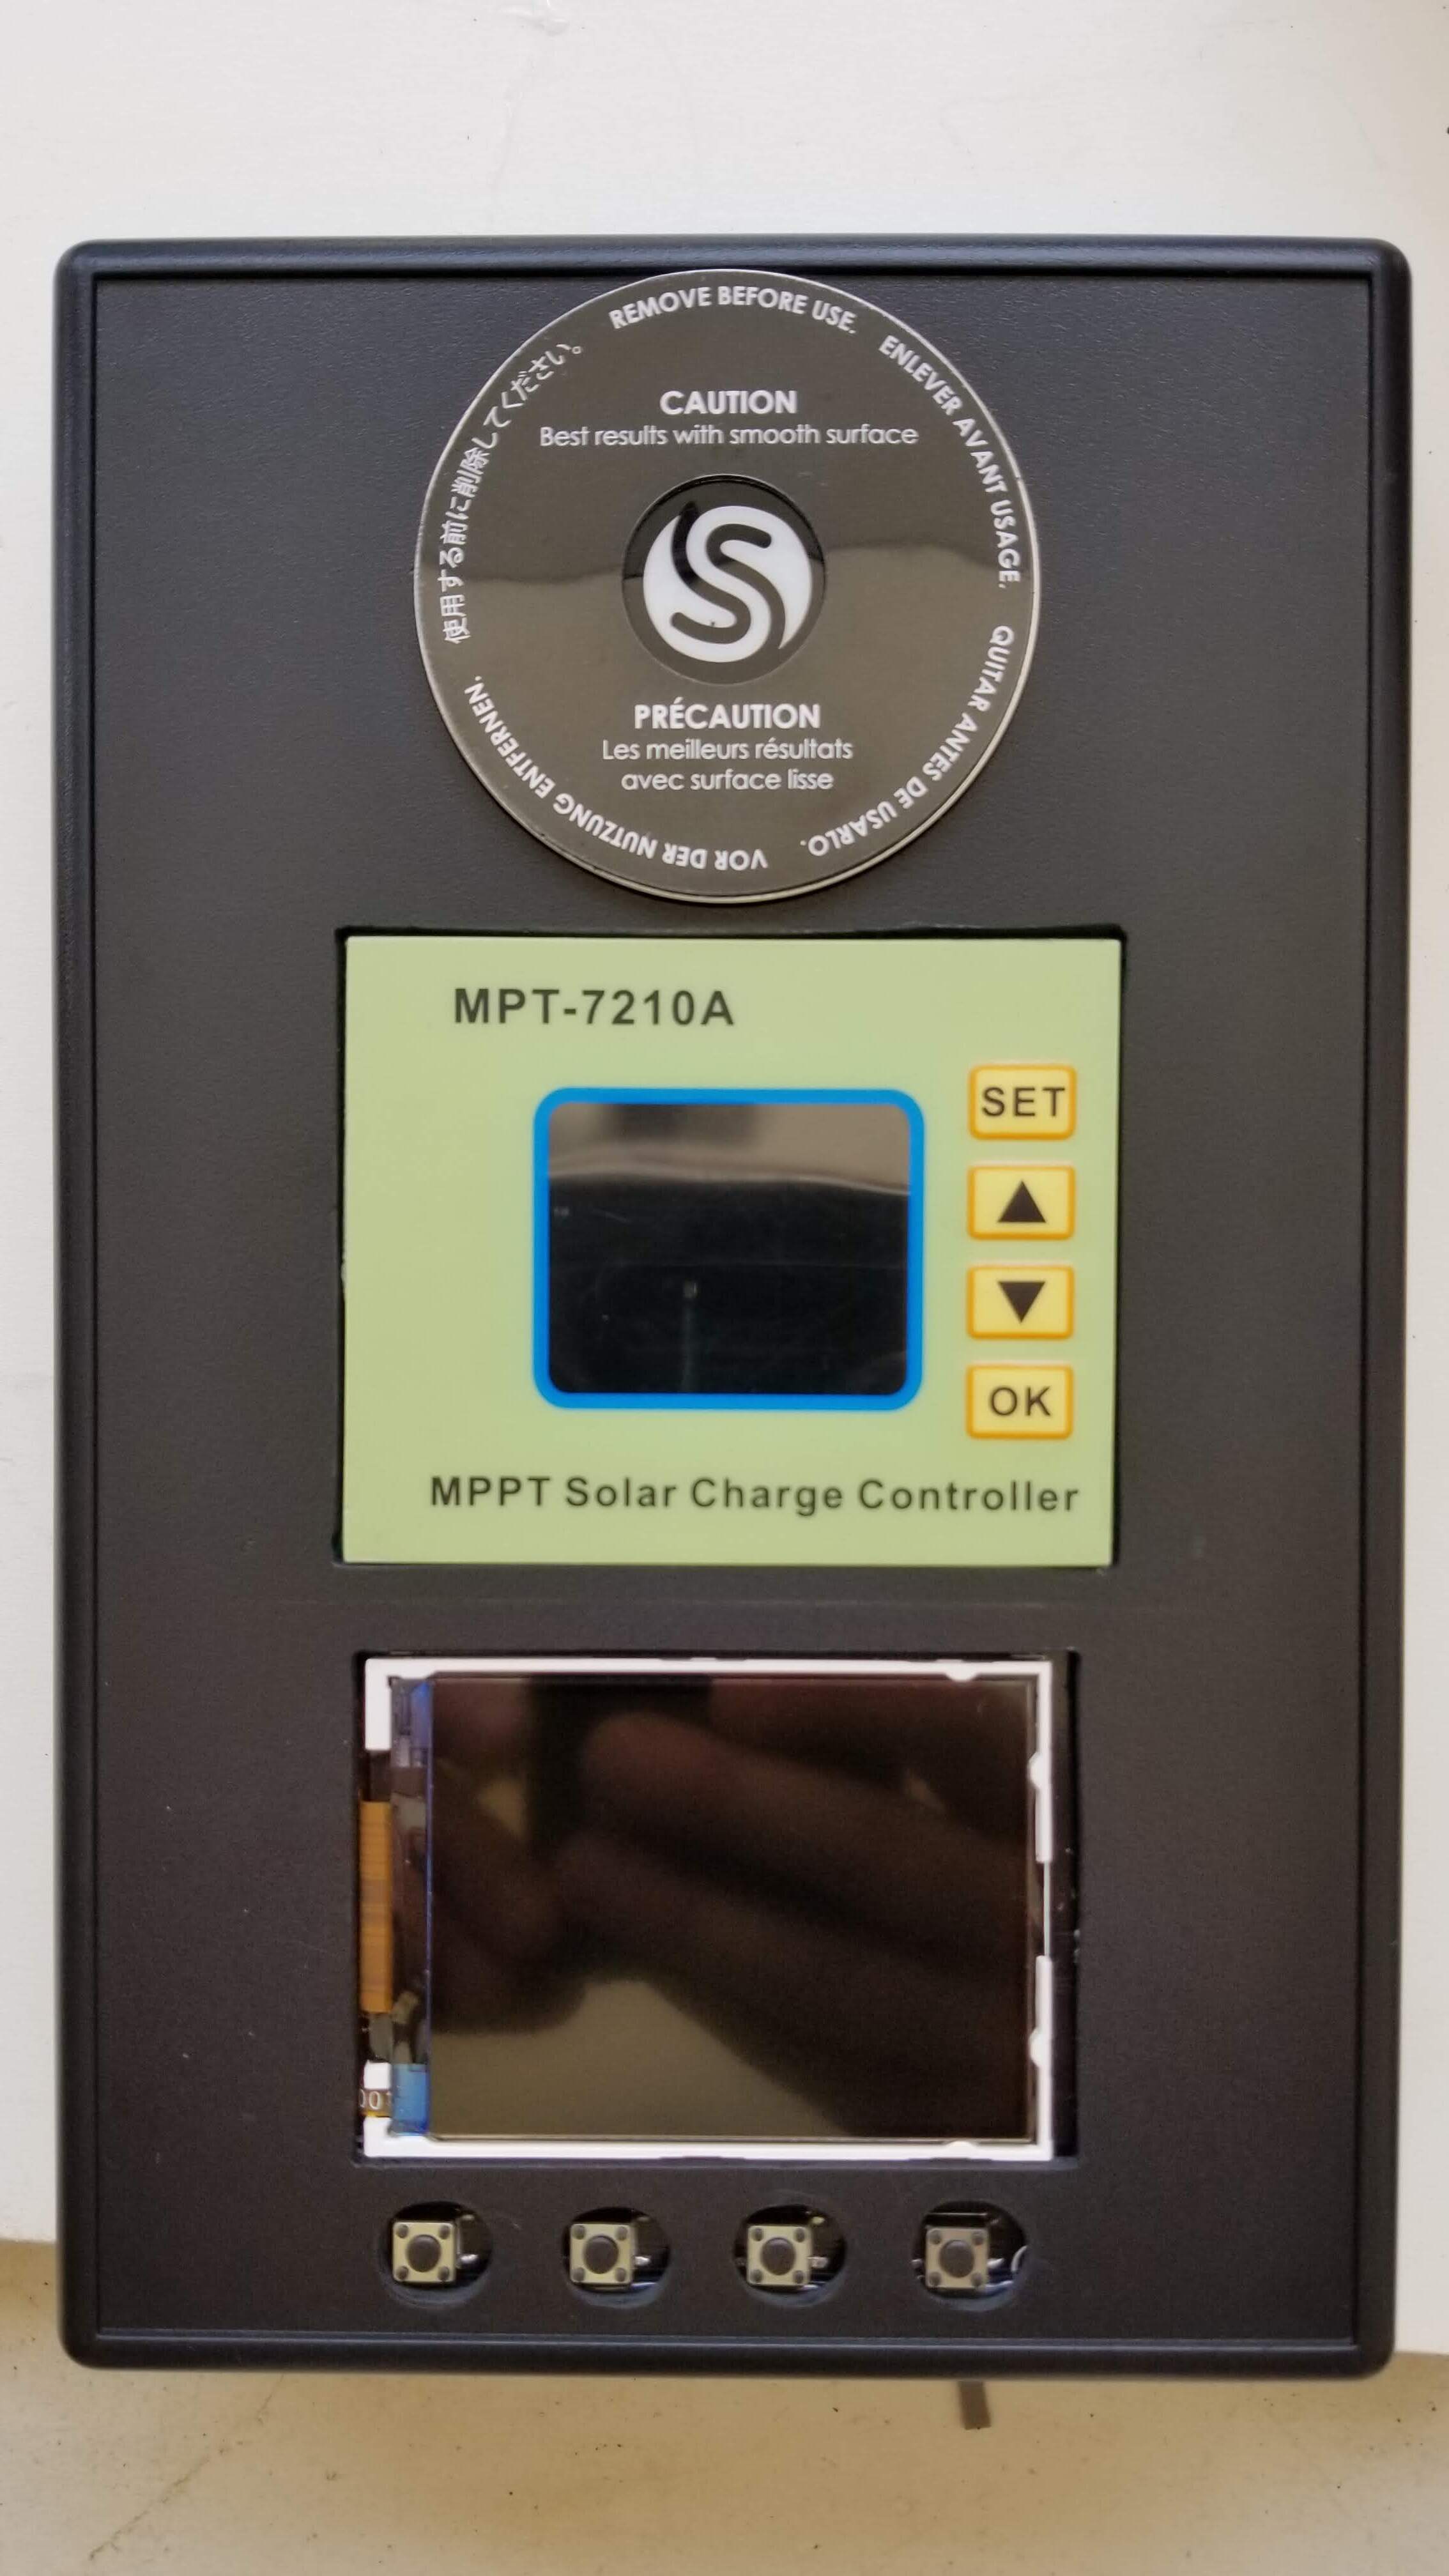
This actually works!
In this mostly sunny example, it is putting out over 1 amp. It is comforting to see it accurately measuring the pack voltage (note how it almost matches the BMS).
I an still messing with the settings but I currently have it set to cut off at 82v with the panel voltage plugged into to improve the targeting of the MPPT (Maximum Power Point Tracking). I have to go re-watch some videos because there is a way to configure the battery pack capacity to get a more accurate charge progress indicator.
The manual leaves a bit to be desired and I found plenty of videos on Youtube. Just search MPT-7210a and settle in for a British documentary on the subject.
The loud fan as seen in the videos is not a problem. I cut out the vent circle as suggested by some dude on YT. However on the unit I received, the fan has not run at all yet. Either they updated the design to be thermostatically controlled or I forgot to hook it back up or it is a bad fan. It is not heating up at all though and will not be pushing it to near capacity, but I will investigate.
Cleaned Up
My GEM is not cosmetically perfect. I got it in basically non-working condition. I took off some crappy stickers and the rest of the word El*ctric missing letters. The 7.0 badge no longer applies. I may order replacement door decals because one was damaged and I removed the other to match. I re-seated the rear window and added a couple of retainer screws (seems like a flawed design for the rear window the way it bowed up in the middle). I need to reinstall the front heavy duty bumper which I cleaned and repainted in aluminum silver. I have new tires & some unique throwback “full moon” stainless hubcaps to install.
Maybe a few well placed reflective strips or a trip to the dent doctor would help but she cleans up okay. She’s definitely one-of-a-kind and she’s my little GEM.
That reminds me… I’ve had insurance for a month and sent in my paperwork the same day and I’m still waiting on that “RIX-GEM” plate from PENDOT. No temp tags for NEV’s in PA and did not even have a law pertaining to NEV’s until 2014


 It has quick charge USB ports and a handy volt meter so I can monitor the 12v supply.


